|
|
||
|---|---|---|
| .. | ||
| img | ||
| Makefile | ||
| Murax_iCE40_hx8k_breakout_board_xip.pcf | ||
| README.md | ||
README.md
This example is for the Lattice iCE40HX-8K Breakout Board.
An image of this board is shown below;
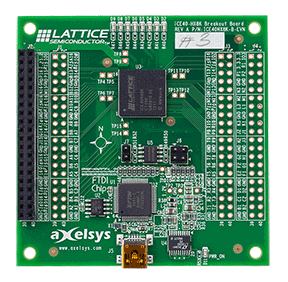
This board can be purchased for ~$USD 49 directly from Lattice and is supported
by the IceStorm
iceprog tool.
Bootloader operations
A bootloader is implemented in a ROM within the FPGA bitfile. It configure the SPI and attempt to read the first word in 'XIP' area of the flash (0xE0040000 in CPU address space, 0x40000 in flash). If this first word is not 0xFFFFFFFF and the same value is read 3 times, then the bootloader jump at 0xE0040000.
Using the example
Before Starting
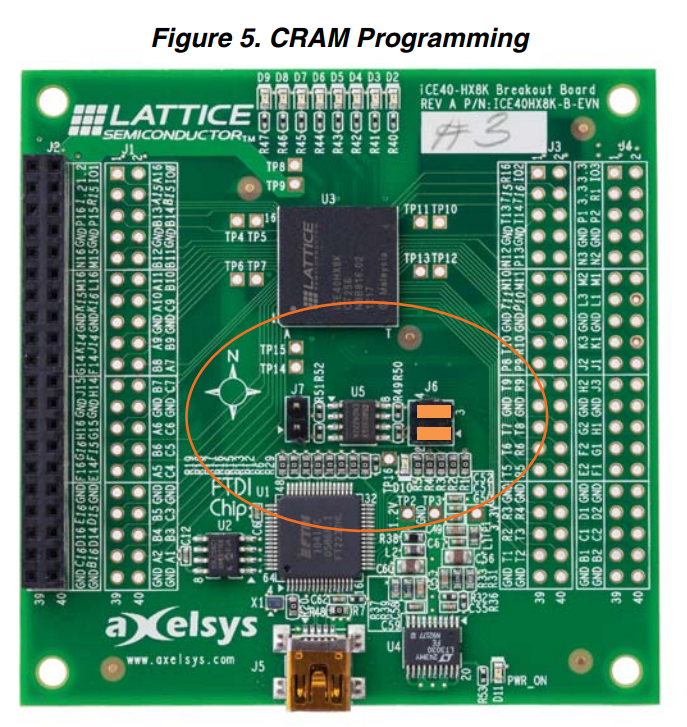
Before starting make sure that your board is configured for CRAM Programming
mode. This requires removing jumper J7 and putting the pair of jumpers on
J6 to be parallel to the text on the board.
This is shown in Figure 5 of the iCE40HX-8K Breakout Board User Guide. which is also reproduced below;
Once your board is ready, you should follow the setup instructions at the top level.
You should make sure you have the following tools installed;
- Yosys
- arachne-pnr
- icestorm tools (like icepack and iceprog)
- riscv toolchain
- sbt
Building
You should be able to just type make compile and get output similar to this;
...
  place time 10.14s
route...
  pass 1, 15 shared.
  pass 2, 4 shared.
  pass 3, 1 shared.
  pass 4, 0 shared.

After routing:
span_4     4406 / 29696
span_12    951 / 5632

  route time 9.12s
write_txt bin/toplevel.asc...
icepack bin/toplevel.asc bin/toplevel.bin
The process should take around 30 seconds on a reasonable fast computer.
Programming
Make sure the FPGA board is the only USB peripheral with ID 0403:6010
For example, this is bad:
user@lafite:~$ lsusb -d 0403:6010
Bus 001 Device 088: ID 0403:6010 Future Technology Devices International, Ltd FT2232C Dual USB-UART/FIFO IC
Bus 001 Device 090: ID 0403:6010 Future Technology Devices International, Ltd FT2232C Dual USB-UART/FIFO IC
This is good:
user@lafite:~$ lsusb -d 0403:6010
Bus 001 Device 088: ID 0403:6010 Future Technology Devices International, Ltd FT2232C Dual USB-UART/FIFO IC
After building you should be able to run make prog. You may need to run make sudo-prog if root is needed to access your USB devices.
You should get output like the following;
lsusb -d 0403:6010
Bus 001 Device 088: ID 0403:6010 Future Technology Devices International, Ltd FT2232C Dual USB-UART/FIFO IC
iceprog -S bin/Murax_iCE40_hx8k_breakout_board_xip.bin
init..
cdone: high
reset..
cdone: low
programming..
cdone: high
Bye.
WARNING: having this output does NOT guarantee you actually programmed anything in the FPGA!
After programming nothing visual will happen, except the LEDs being off. The bootloader is waiting for a valid content in the flash (see Bootloader operations).
Programming flash image
Connect JTAG
We will use vexrisc JTAG to program the flash, so you need openocd and a suitable JTAG dongle.
Pin-out:
TCK: H16 aka J2.25
TDO: G16 aka J2.26
TDI: G15 aka J2.27
TMS: F15 aka J2.28
In addition you need to connect the ground and VTarget aka VIO: J2.2 on the board.
Start GDB server / OpenOCD
Make sure to use https://github.com/SpinalHDL/openocd_riscv Make sure to select the configuration file which match your JTAG dongle.
An example with the dongle "ft2232h_breakout":
src/openocd -f tcl/interface/ftdi/ft2232h_breakout.cfg -c "set MURAX_CPU0_YAML ../VexRiscv/cpu0.yaml" -f tcl/target/murax_xip.cfg
You should get an output like below:
Open On-Chip Debugger 0.10.0+dev-01214-g0ace94f (2019-10-02-18:23)
Licensed under GNU GPL v2
For bug reports, read
	http://openocd.org/doc/doxygen/bugs.html
../VexRiscv/cpu0.yaml
adapter speed: 100 kHz
adapter_nsrst_delay: 260
Info : auto-selecting first available session transport "jtag". To override use 'transport select <transport>'.
jtag_ntrst_delay: 250
Info : set servers polling period to 50ms
Error: libusb_get_string_descriptor_ascii() failed with LIBUSB_ERROR_INVALID_PARAM
Info : clock speed 100 kHz
Info : JTAG tap: fpga_spinal.bridge tap/device found: 0x10001fff (mfg: 0x7ff (<invalid>), part: 0x0001, ver: 0x1)
Info : Listening on port 3333 for gdb connections
requesting target halt and executing a soft reset
Info : Listening on port 6666 for tcl connections
Info : Listening on port 4444 for telnet connections
Loading the flash with telnet
First we connect and stop execution on the device:
user@lafite:~/Downloads/vexrisc_full/VexRiscv/src/main/c/murax/xipBootloader$ telnet 127.0.0.1 4444
Trying 127.0.0.1...
Connected to 127.0.0.1.
Escape character is '^]'.
Open On-Chip Debugger
> reset
JTAG tap: fpga_spinal.bridge tap/device found: 0x10001fff (mfg: 0x7ff (<invalid>), part: 0x0001, ver: 0x1)
>
Now we can safely connect the J7 jumper on the board to be able to access the flash. After that, we can load the program in flash:
> flash erase_sector 0 4 4
erased sectors 4 through 4 on flash bank 0 in 0.872235s
> flash write_bank 0 /home/user/dev/vexrisc_fork/VexRiscv/src/main/c/murax/xipBootloader/demo_xip.bin 0x40000
wrote 48 bytes from file /home/user/dev/vexrisc_fork/VexRiscv/src/main/c/murax/xipBootloader/demo_xip.bin to flash bank 0 at offset 0x00040000 in 0.285539s (0.164 KiB/s)
> flash verify_bank 0 /home/user/dev/vexrisc_fork/VexRiscv/src/main/c/murax/xipBootloader/demo_xip.bin 0x40000
read 48 bytes from file /home/user/dev/vexrisc_fork/VexRiscv/src/main/c/murax/xipBootloader/demo_xip.bin and flash bank 0 at offset 0x00040000 in 0.192036s (0.244 KiB/s)
contents match
> reset
JTAG tap: fpga_spinal.bridge tap/device found: 0x10001fff (mfg: 0x7ff (<invalid>), part: 0x0001, ver: 0x1)
> resume
> exit
Connection closed by foreign host.
From now the device runs the code from flash, LEDs shall display a dot moving from D9 to D2.
Loading flash using GDB / eclipse
src/openocd -f tcl/interface/ftdi/ft2232h_breakout.cfg -c "set MURAX_CPU0_YAML ../VexRiscv/cpu0.yaml" -f tcl/target/murax_xip.cfg
- Make sure J7 is connected.
- Connect to GDB / eclipse as usual.
From there code loading, step, break points works as usual (including software break points in flash).
Update hardware/bootloader
- Stop any OpenOCD connection
- Remove J7, then:
make clean prog
- Remember to check a single FTDI device is listed in the output. If not:
- Disconnect the other devices
make prog - Connect J7, flash software shall start executing.
Flash software
Refer to "Loading the flash with telnet" or "Loading flash using GDB / eclipse".